Self hosting on a Raspberry Pi

Scope of this document
This document will primarily act as a concise-ish guide to setting up self-hosted instances of the following
- nginx (reverse proxy)
- Nextcloud (file hosting and collaboration)
From beginning to end, if you follow these instructions, it should take a couple of hours to get eveything set up. This of course depends on your experience level, and how much you want to stop and learn about on the way.
The following was done on a Raspberry Pi 4B, 4GB RAM, with a 32GB SD card. The instructions that follow are for this hardware.
Glossary
Reverse Proxy
‘A reverse proxy is a server that sits in front of web servers and forwards client requests to those web servers (e.g. from a web browser)’ – cloudflare.
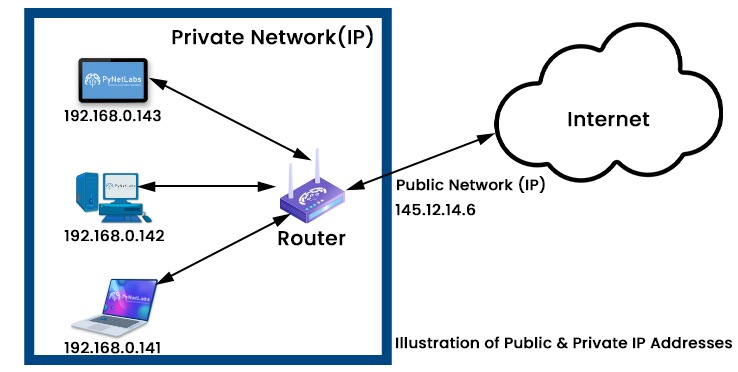
Public and private IP addresses
On your local network (e.g. all the devices connected to your Wi-Fi router), devices are distinguished with a 'private' IP address. These are unique to each device, and typically look like '192.168.1.23' for an IPv4 address. Private IP addresses are only relevant in the context of the private network, they aren't used for addressing on the 'broader' internet.
A public IP address is then the address that can be used to remotely access a device from a different local network. Your router is the public access point to your home network - responses from the internet are addressed to your router publicly, and then the router addresses the devices on the network privately.
DNS
dum dum dum
Setup
Raspberry Pi and OS Setup
Before anything else, the Raspberry Pi has to be booted up with a compatible operating system. This can be done simply by connecting the SD card to a laptop (for example) and flashing the Raspberry Pi operating system onto it.
You can download the 'Raspberry Pi Imager' here.
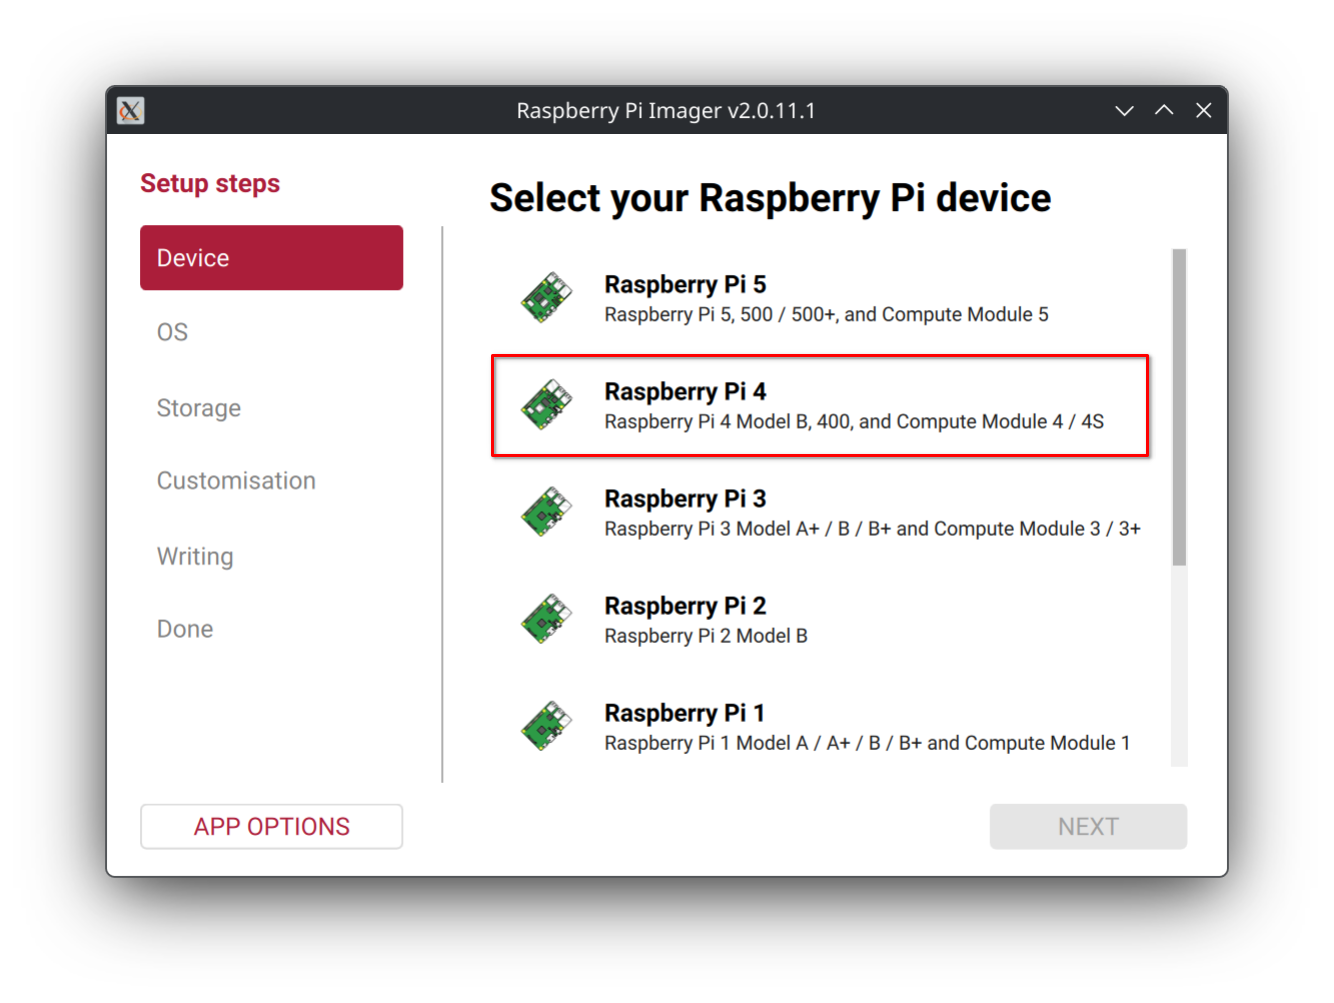
When running the application, you'll first be asked to choose the target device
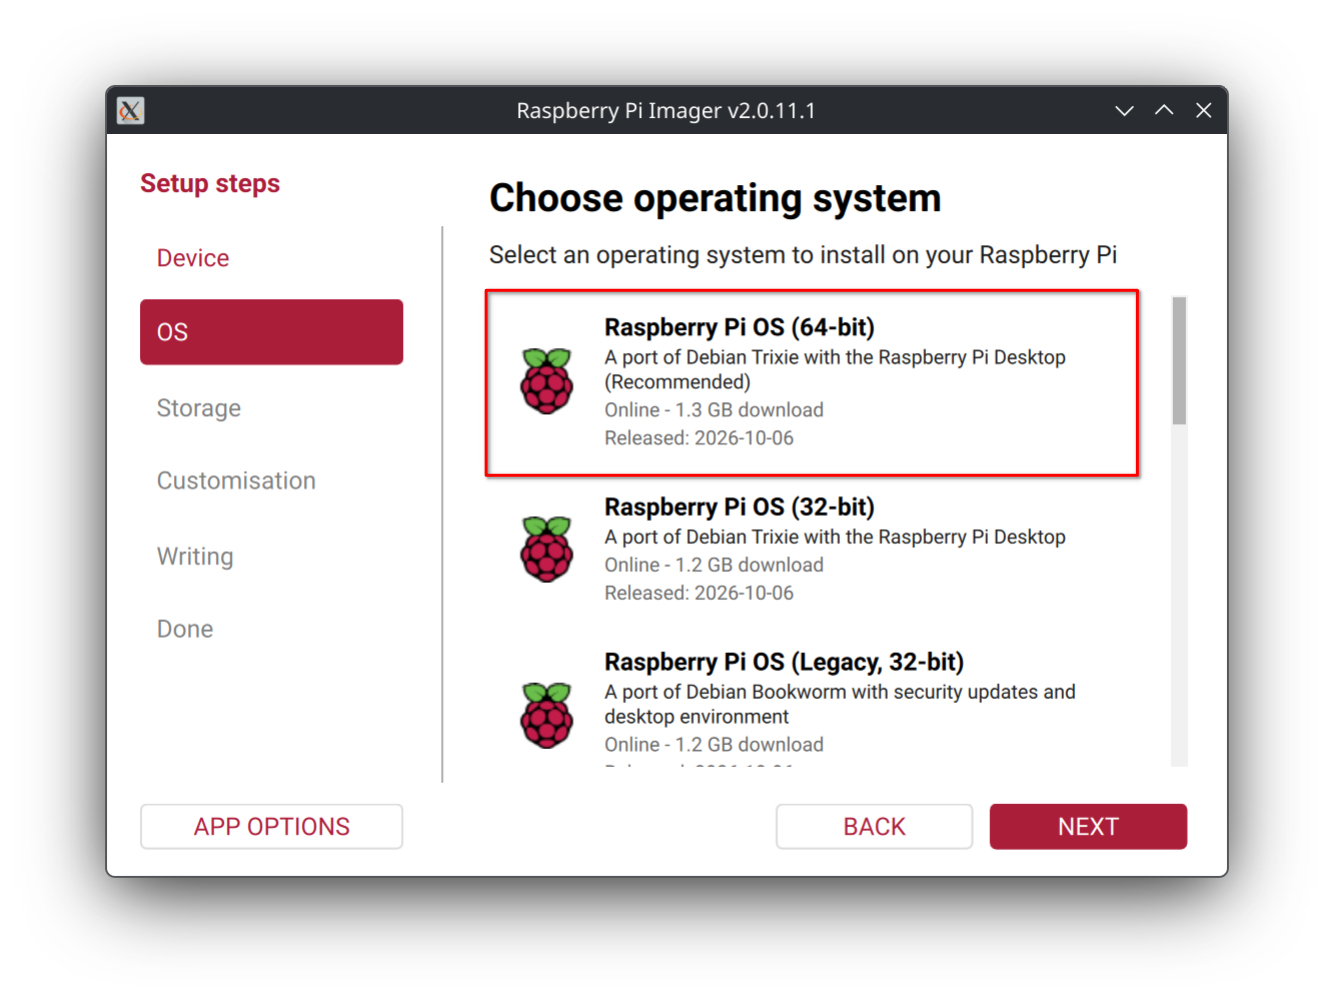
Next you'll be asked to choose the operating system (OS). Choose the 64-bit version because Nextcloud only supports 64-bit.
Next, choose your storage device (the SD card which is connected to your laptop)
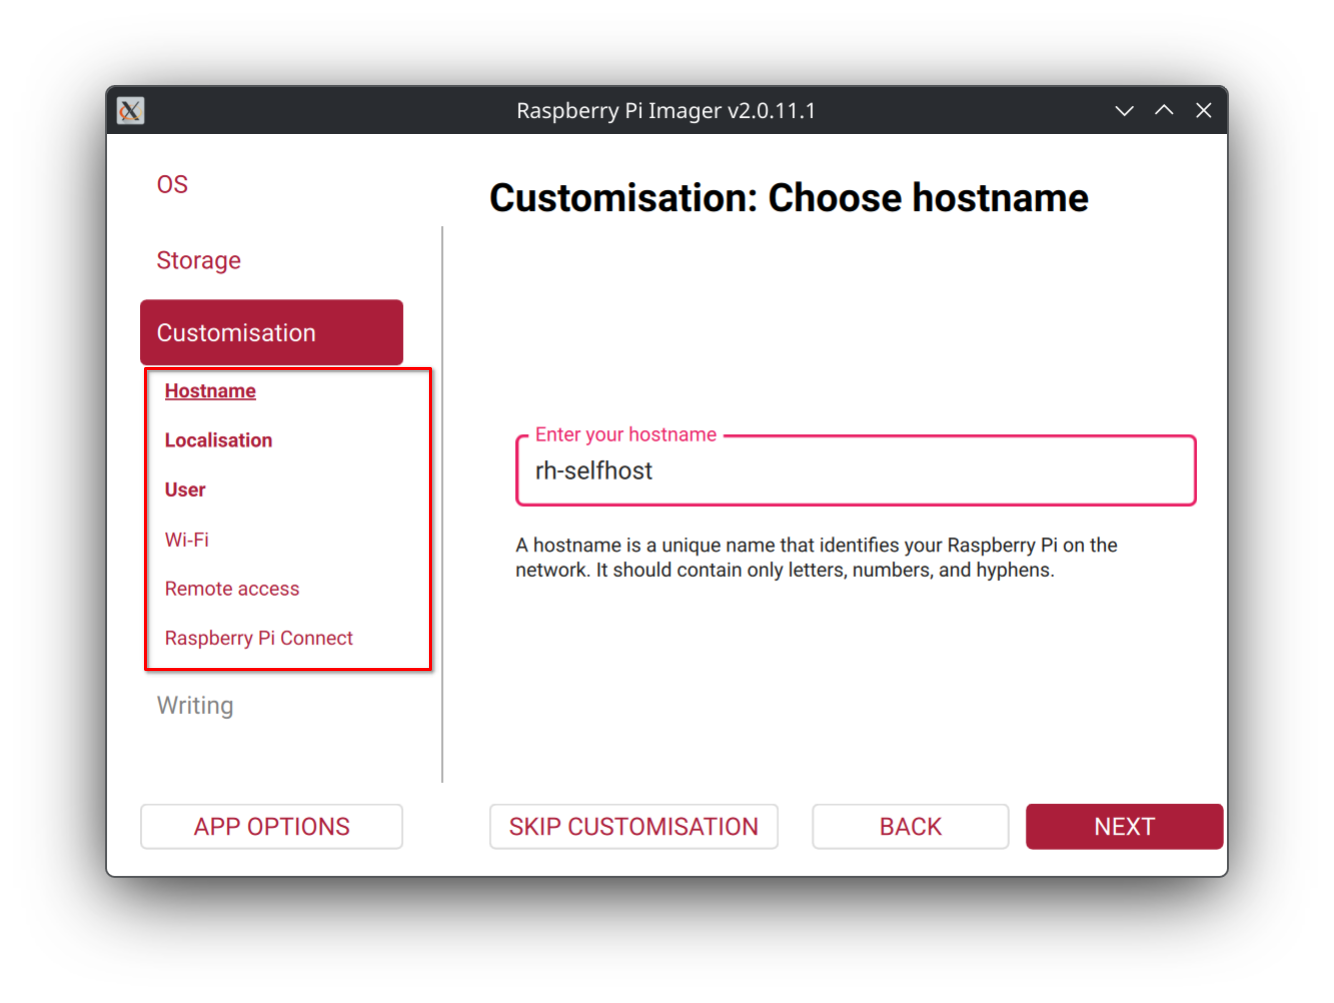
Then follows the customisation steps
- Give your Pi a suitable hostname. I chose 'rh-selfhost' - simple to remember and descriptive when viewing it on busy networks.
- Provide any localisation info (time zone, keyboard layout, etc.)
- Create a user account (i.e. the account you'll log into the device with). Make sure the password is memorable or noted down!
- Enter your home Wi-Fi details (SSID and password)Double check you've enetered the Wi-Fi details correctly! It can be a pain to troubleshoot if you haven't!
- Enable SSH, and use password authentication (simpler!)
- Optinally enable Raspberry Pi Connect, which provides an easy web-based 'remote desktop' style interface for interacting with the Pi.
- This is a 'nice-to-have'. I found I didn't ever need it, and could do the full setup via remote command line tools
- This is not necessarily super straight forward. Try to follow the instructions, and make sure to take a note of the auth key
- Once you have an account, go to https://connect.raspberrypi.com/devices, and if your Pi is powered on (and on the Wi-Fi), then you should have remote access!
Finally, commit to writing this customised 'image' onto the SD card. Now you can plug the card into the slot on the Raspberry Pi and power it up. If everything went right, the Pi will automatically connect to the Wi-Fi, and you'll be able to log in either via a command line tool (ssh <hostname>), or via Raspberry Pi Connect (https://connect.raspberrypi.com/devices).
nginx
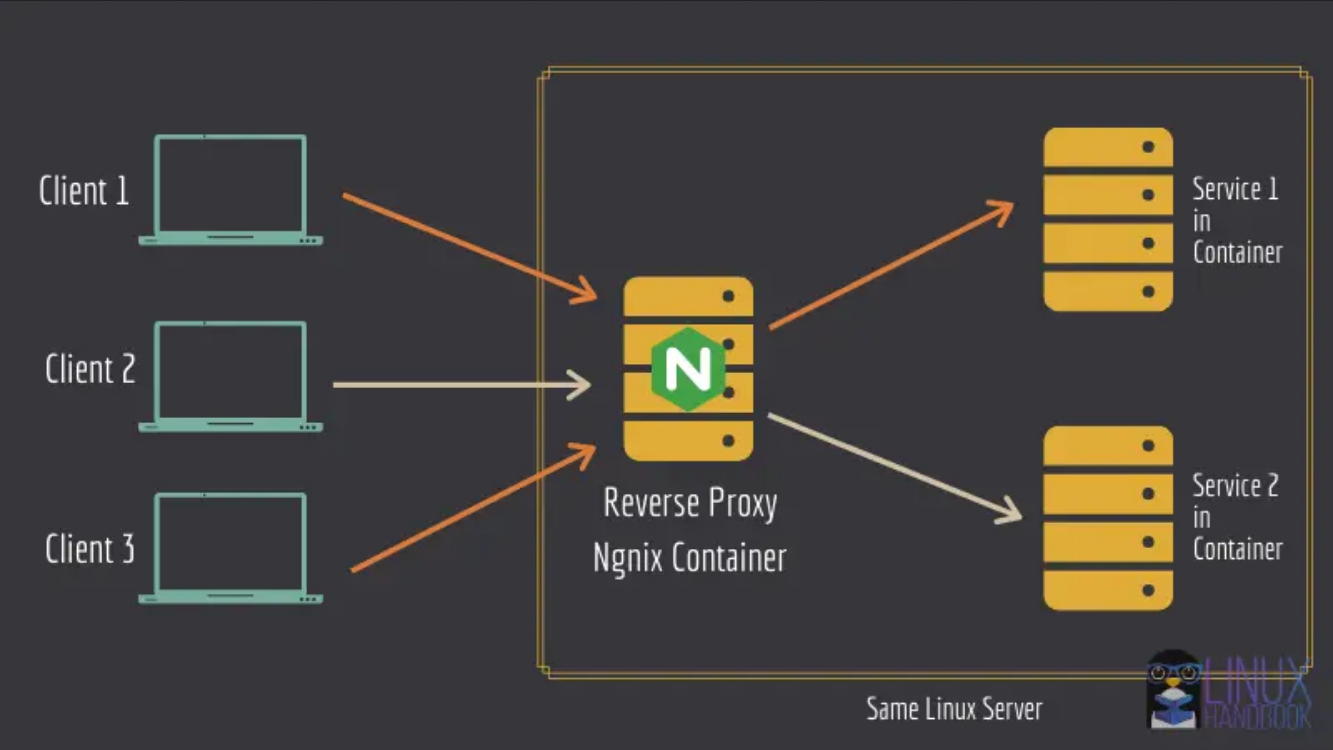
Prounced 'engine x', nginx is primarily a web server software. In short, this means it runs on a device, receives incoming HTTP/HTTPS requests, and returns a response from the relevant location.
In our example, if we're running Nextcloud and Lemmy on a Raspberry Pi, and I use my laptop to connect to Nextcloud, nginx receives this request and passes it to the Nextcloud instance running internally. Then the Nextcloud instance passes the data to nginx which then returns it back to me.
Nginx can also be configured as a 'reverse proxy', and this is how we'll use it. Think of a reverse proxy as something sitting inside the Raspberry Pi - inbetween the network interface and the web applications. In this configuration, nginx acts as an intermediary to service many requests to different services in parallel.
Make sure the Pi is up to date
If you haven't already, make sure the Pi is on and connected to your home Wi-Fi network, then remote access into it via your preffered method (e.g. ssh)
ssh <hostname>
# e.g. ssh rh-selfhost
Then make sure everything is up to date (this may take a while!).
sudo apt update
sudo apt upgrade
Uninstall Apache
It may be the case that the Pi already has Apache (another web server software) installed. We should uninstall this to prevent conflicts.
sudo apt remove apache2
Install nginx
Install nginx onto the Pi using the package manager.
sudo apt install nginx
Start the nginx service,
sudo systemctl start nginx
Verify proper functioning
Start by finding the private IP address of your Pi (i.e. the address of the Pi within your home Wi-Fi network).
The address will most likely look something like '192.168.1.62'
hostname -I
# the first returned value is the private IP address
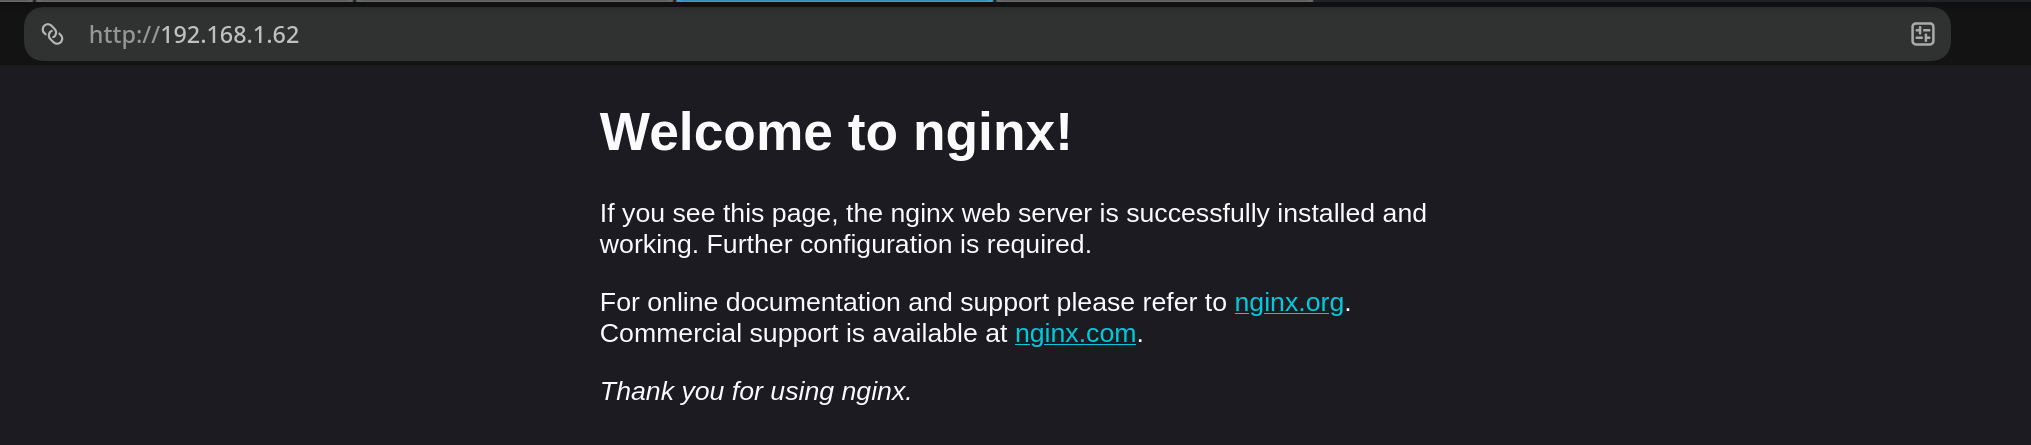
Now if you open your web browser, and enter that IP address into the URL bar, you should hopefully be greeted with a screen like the below. This is the 'default' nginx page, and indicates that the nginx web server has successfully facilitated a communication between your laptop and the Raspberry Pi 😃
Domain and routing setup (DNS, port forwarding, etc)
DNS stands for 'Domain Name Server'. It's a dedicated server that translates human-friendly domains (like eff.org or miniclip.com) into IP addresses. When you try to connect to a website, your computer sends the domain name to the DNS, and the DNS responds with the public IP address of the server that hosts the website you're trying to connect to.
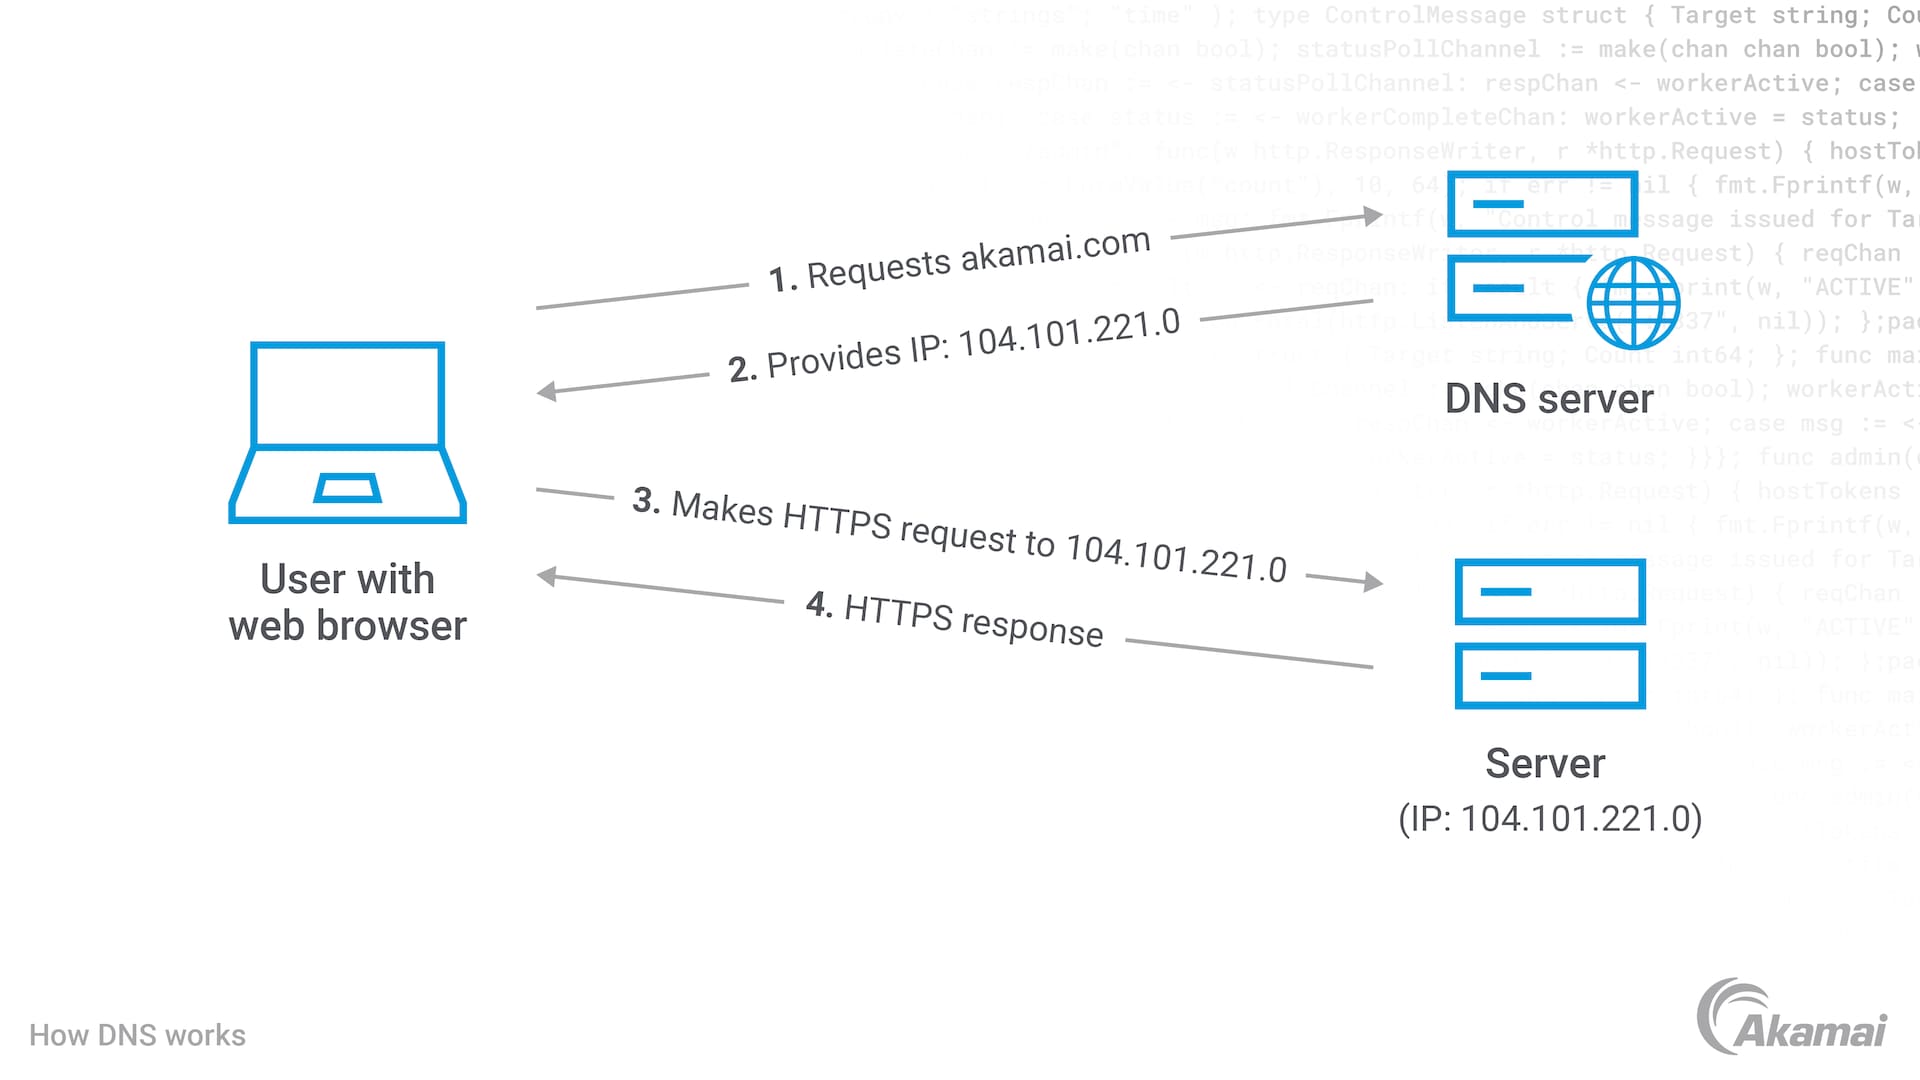
We'll set up a few DNS records (instructions) that tell a DNS server to direct us to our self-hosted websites when we enter our custom domain into a browser.
Buy a domain (if you don't have one)

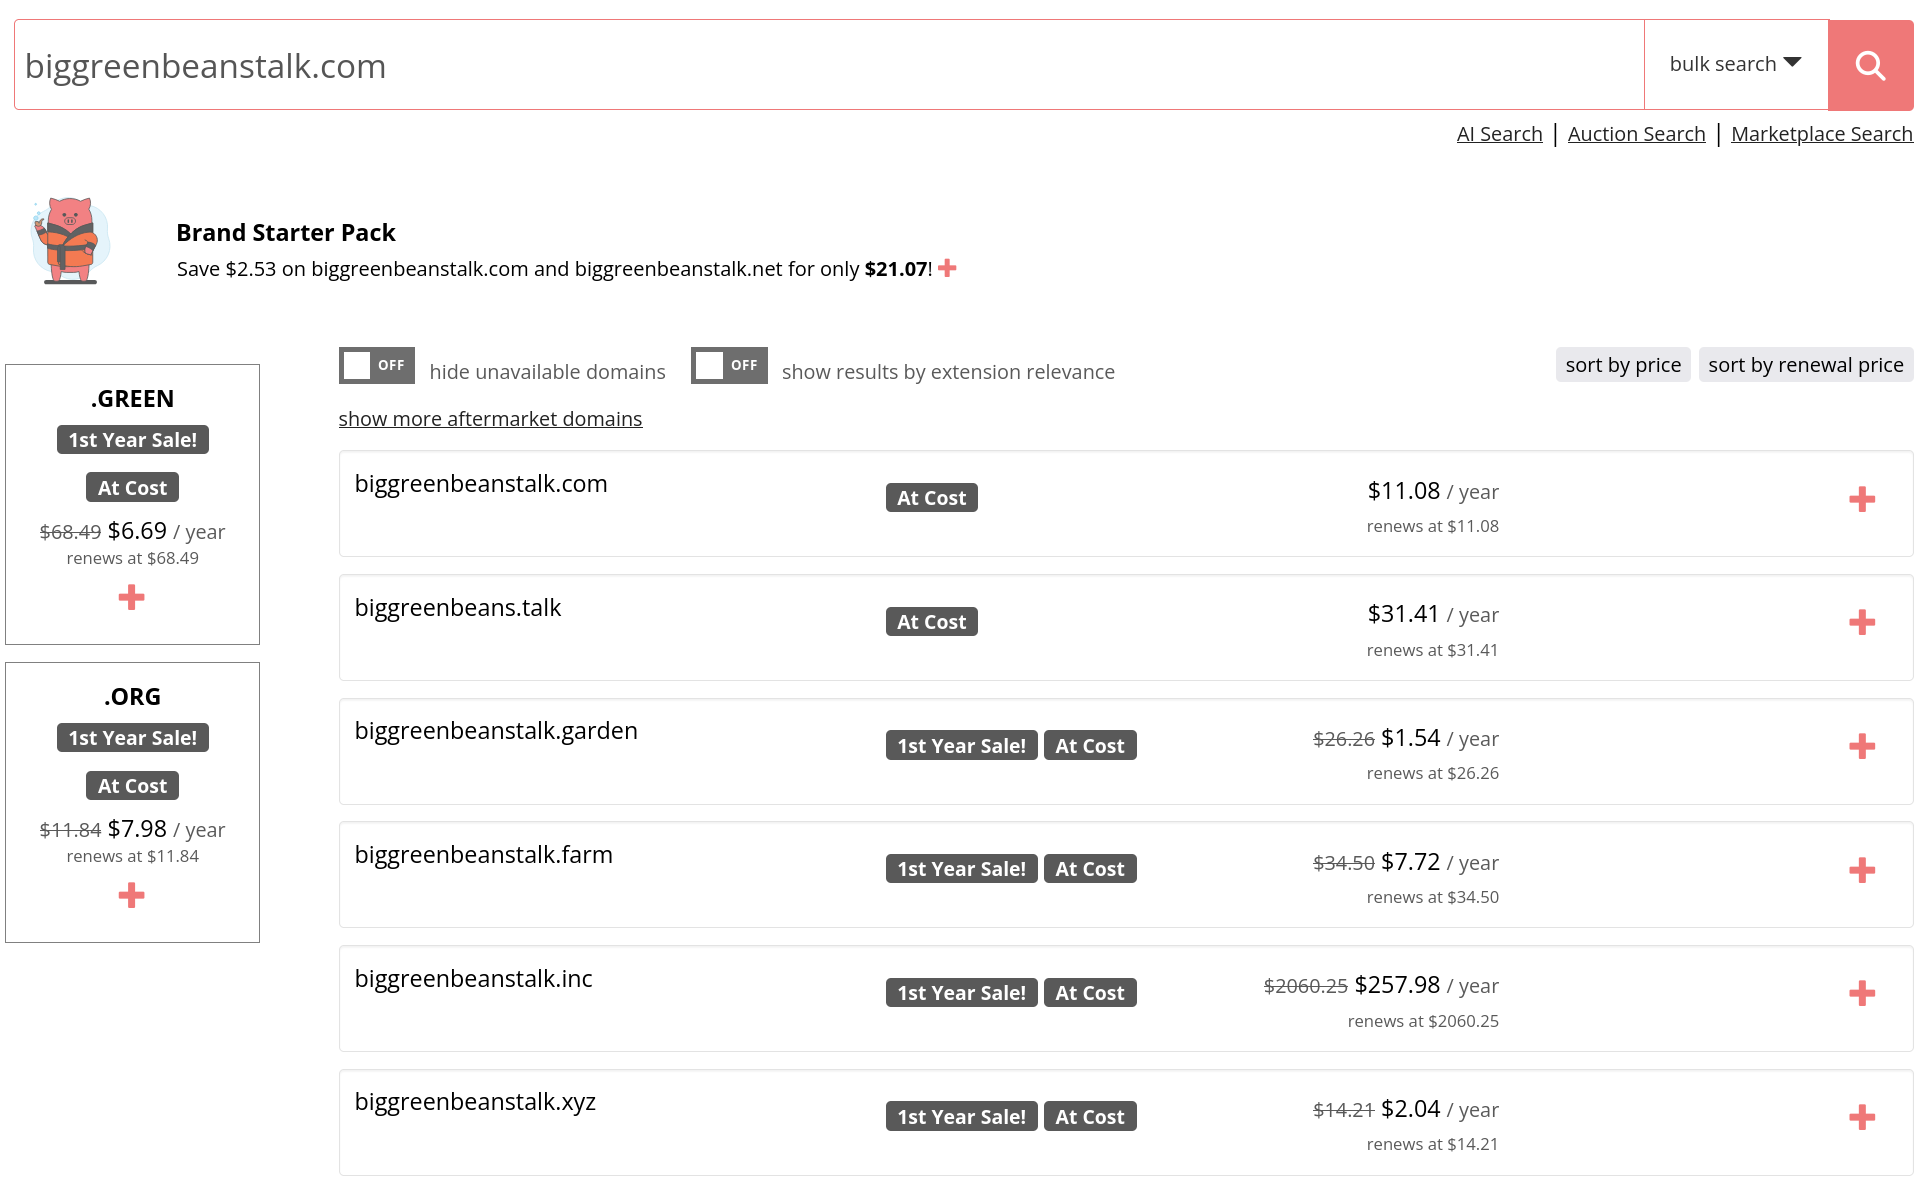
Your life will be much easier with a domain. You can technically do it without one but it is annoying! A domain can cost less than £10 a year (mine is less than 40p per month!)
Once you have a domain, you can use it for all sorts. For that money, it's for sure a worthwhile thing to have.
I'd recommend using porkbun.com just from personal experience.
Find the public IP address of the Raspberry Pi
Soon we're going to create a DNS record. This will allow us to point a domain to the Raspberry Pi, such that when we type the domain into a web browser, it will point our request to the Pi.
We therefore need to know the public address of our Raspberry Pi. It may be of interest to know that the public IP address is (most likely) just the public IP address of the Wi-Fi router that the Pi is connected to.
We can find the public IPv4 address with curl, which is a simple utility that sends a request to a URL. URLs like icanhazip.com then return your public IP address.
curl -4 icanhazip.com
Set port forwarding on your router
Routers tend to be configured with safety in mind (with good reason). However, this means that typically the Wi-Fi router tries to block incoming requests to devices on the network (most often, a home Wi-Fi network shouldn't be exposed to external connections).
However, for this application, we have put a server inside our home Wi-Fi network that we want to access from outside our Wi-Fi network, and so we need to configure the router to allow requests. This can be done on a device-by-device basis, to limit the access to the rest of the network.
Create a DNS record
Once you have a domain of your own, you can create a subdomain. A subdomain looks like subdomain.domain.com. For a very basic example, I did my first tests on nextcloud.haggart.co.uk.
This is nice, because for the cost of a single domain, we suddenly get lots of options with subdomains.
Now we just have to create a simple DNS record to point a subdomain at our Raspberry Pi. The following instructions are for Porkbun, and may differ for other providers.
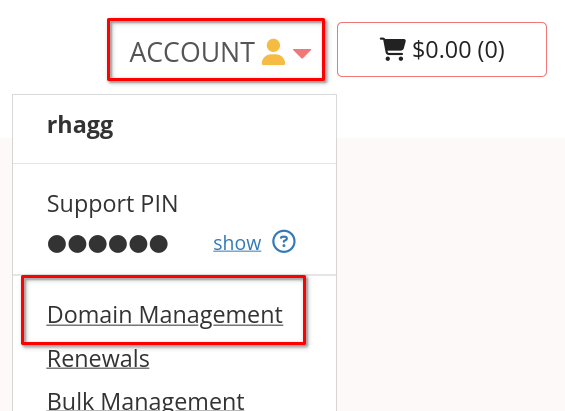
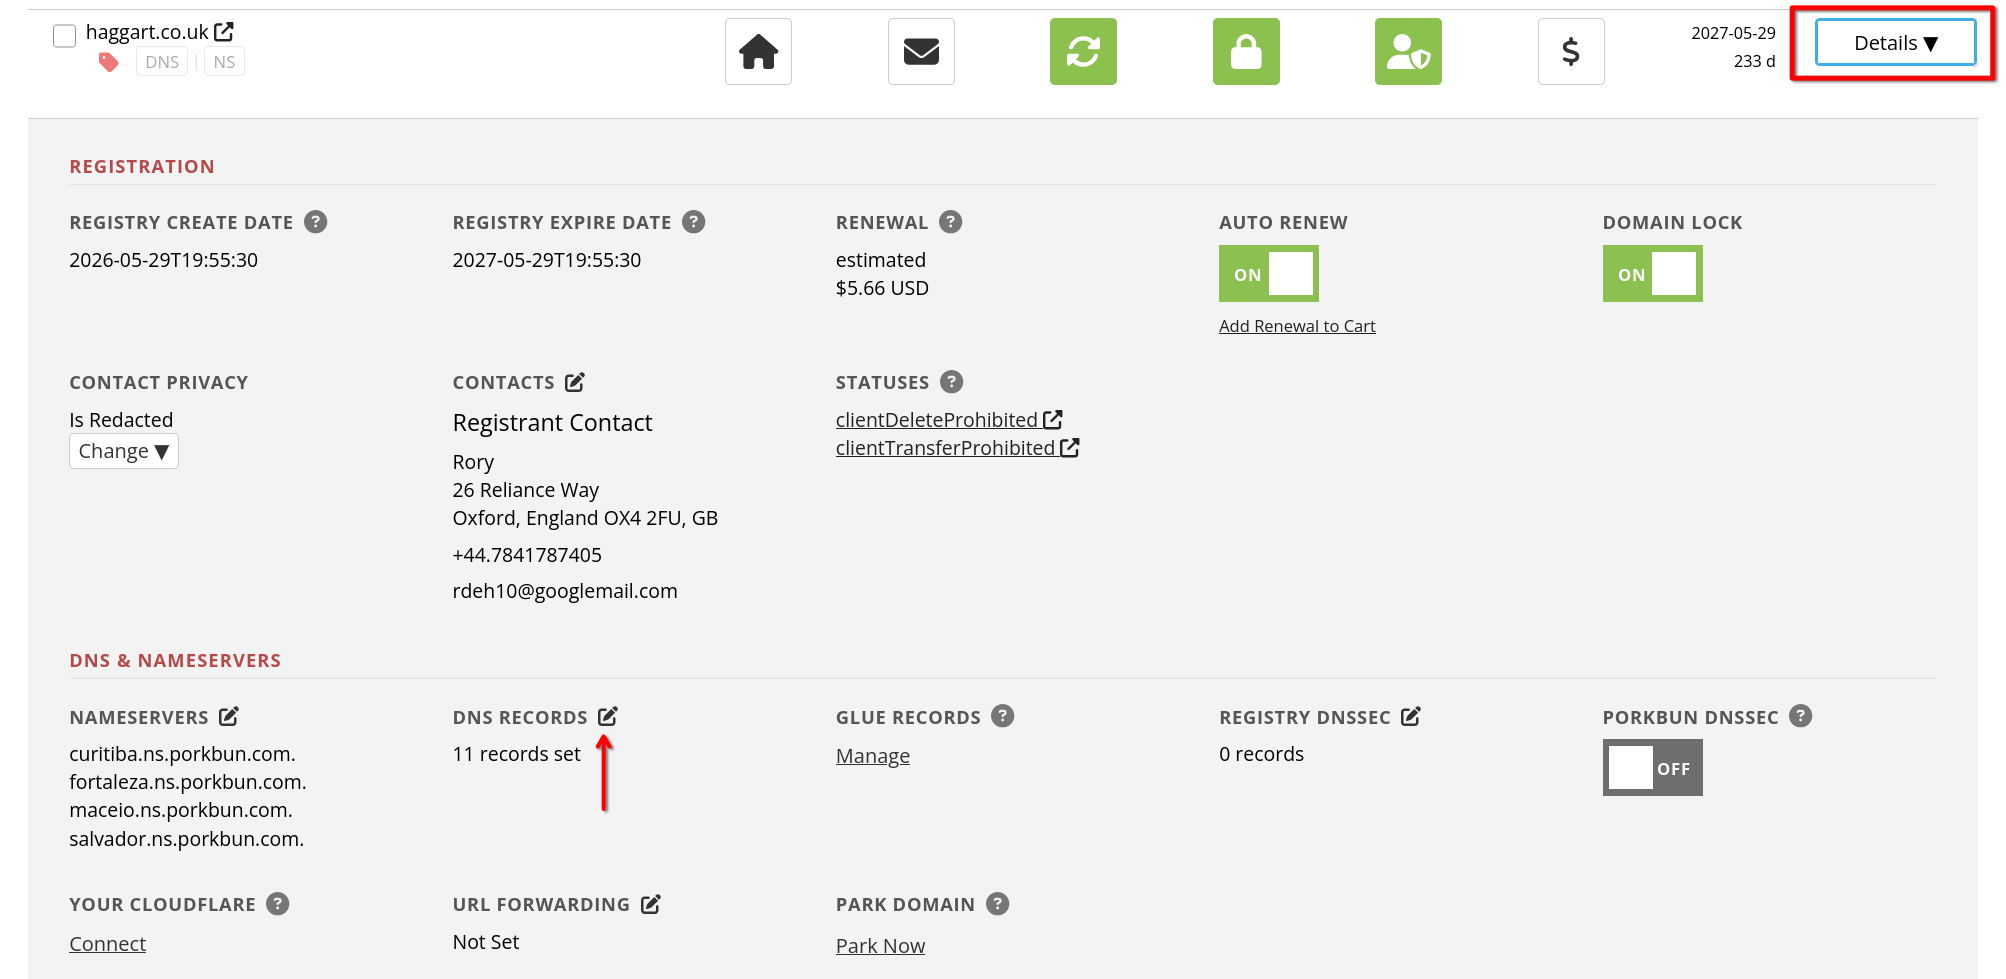
Then, expand the details for your domain with the rightmost button, and select the 'edit' icon for the DNS records.
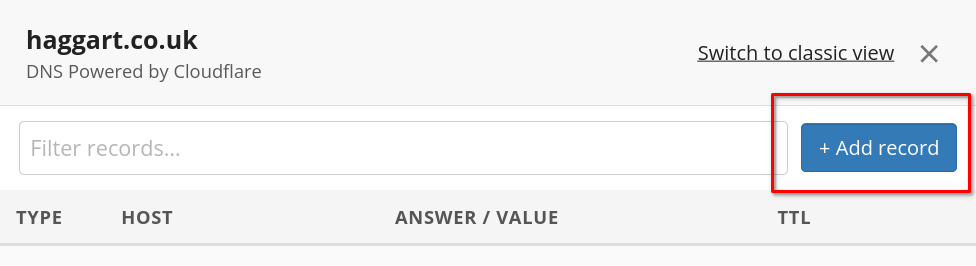
Then select 'add record' to create a new DNS record for the domain
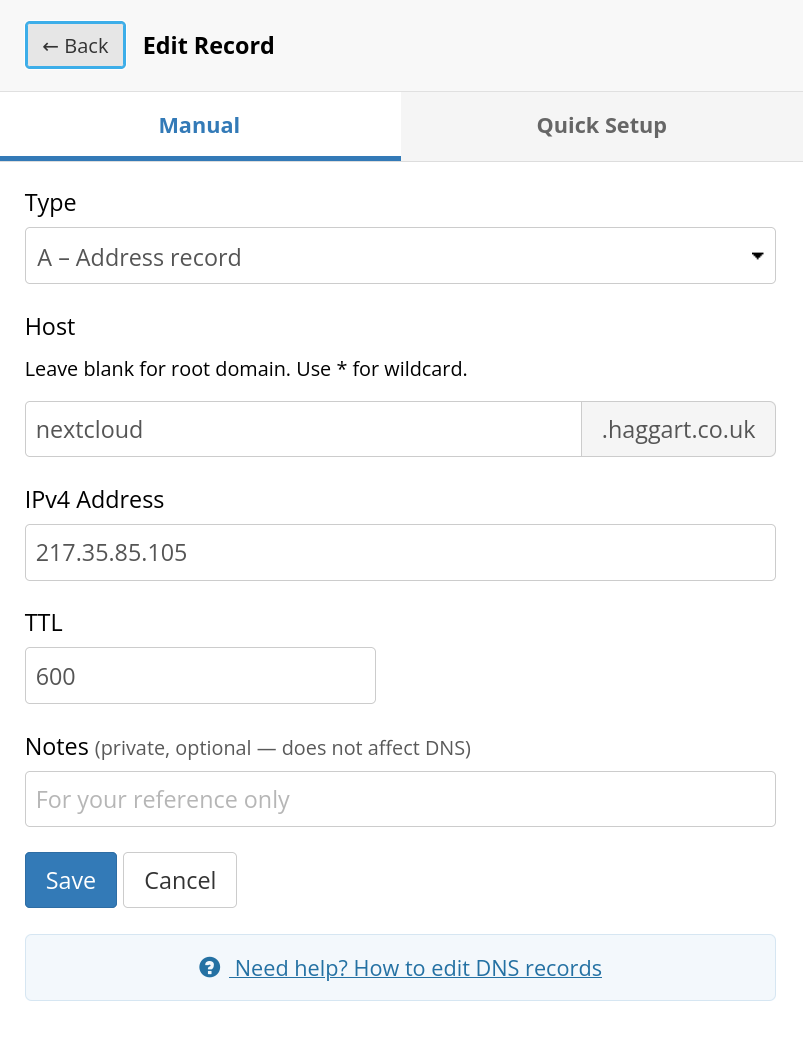
Finally, we create a simple A (Address) record. All we need to enter is the subdomain (the part in front of your domain name), and the public IP address that we obtained with curl in the previous step.
Nextcloud
A helpful explainer from this guide:
Nextcloud AIO (All-in-One) has been the officially recommended installation method since 2022. A “master container” automatically manages all other containers – Nextcloud itself, the PostgreSQL database, Redis cache, and optionally Collabora Office, Talk or Backup. Updates run through the web interface with a single click. AIO is 64-bit only (x86_64 and arm64) – on the Pi that means the 64-bit Raspberry Pi OS, which is the default on Pi 4 and Pi 5 anyway.
Install Docker
Docker is how the AIO is containerised, so if Docker isn't already installed:
curl -fsSL https://get.docker.com | sudo sh
sudo usermod -aG docker $USER
Now restart or log in again to apply the user changes
Start AIO
The AIO (all-in-one) has an Apache web server built in, and so it can handle its own web requests. However, we want to run multiple web services on the Pi, so we instead setup the AIO to run behind the reverse proxy that we're setting up (nginx).
The below command is from the official Nextcloud documentation. That page also includes a line-by-line explanation for each of the options we're entering here.
sudo docker run \
--init \
--sig-proxy=false \
--name nextcloud-aio-mastercontainer \
--restart always \
--publish 8080:8080 \
--env APACHE_PORT=11000 \
--env APACHE_IP_BINDING=0.0.0.0 \
--env APACHE_ADDITIONAL_NETWORK="" \
--env SKIP_DOMAIN_VALIDATION=false \
--volume nextcloud_aio_mastercontainer:/mnt/docker-aio-config \
--volume /var/run/docker.sock:/var/run/docker.sock:ro \
ghcr.io/nextcloud-releases/all-in-one:latest
Test the connection
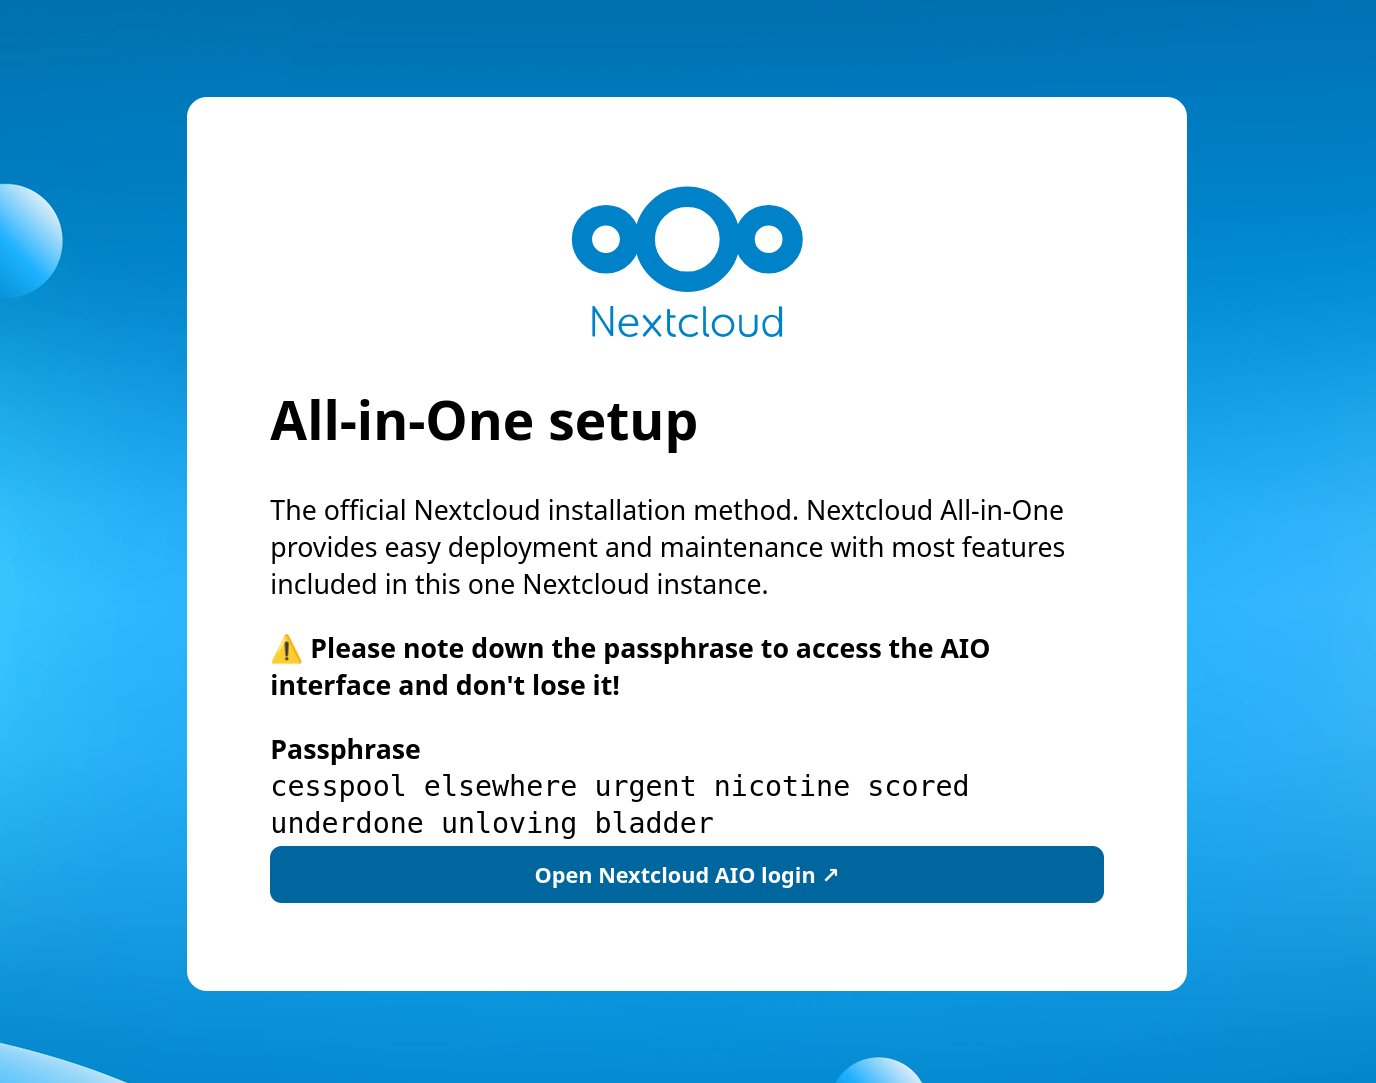
This should already have started the AIO running on your Pi. To test the connection, use your PC and go to https://<pi_ip_address>:8080 in your browser (replacing <pi_ip_address> with the private IP address of the Pi). Port 8080 is the management/config interface for Nextcloud AIO.
hostname -I on the Pi to get the private IP addressIf everything's working, you should see the Nextcloud AIO setup page, which displays a passphrase.
We're not going to set this up yet, as we need to setup the reverse proxy connection first.
Reverse proxy setup and configuration
Ok so to recap so far
- We installed nginx and it now serves basic web requests
- We setup a DNS record to point a request to a custom subdomain to our Pi
- We installed Nextcloud AIO and connected to the management portal
Next, we need to configure nginx as a reverse proxy that will listen to incoming web requests and forward them on to the relevant service as appropriate, and return the data from the service to our PC.
Create a configuration for Nextcloud
Create a file for the Nextcloud connection. This file will tell nginx that any requests for the subdomain we set up (e.g. nextcloud.haggart.co.uk) are to be passed to the Nextcloud instance.
Create the file:
sudo nano /etc/nginx/sites-available/nextcloud
And populate the file with the below, replacing <domain_name> with the domain you registered with the DNS:
server {
    listen 80;

    server_name <domain_name>; # e.g. <domain_name> = nextcloud.haggart.co.uk;

    location / {
        proxy_pass http://127.0.0.1:11000;

        proxy_set_header Host $host;
        proxy_set_header X-Real-IP $remote_addr;
        proxy_set_header X-Forwarded-For $proxy_add_x_forwarded_for;
        proxy_set_header X-Forwarded-Proto $scheme;
    }
}
If we look back at the Nextcloud section, we can see that the docker run command included an option --env APACHE_PORT=11000. We basically told the Apache web server (that is a part of the Nextcloud instance) to service requests on port 11000. Now, if we look at the contents of the configuration file above, proxy_pass http://127.0.0.1:11000 means 'forward requests to local port 11000' (127.0.0.1 just means 'this device').
So, in short, we've told nginx to forward requests directed at the Nextcloud subdomain on to the Nextcloud instance.
Create a symlink
This is now a valid configuration for the server, so we can make the site 'enabled'. For nginx, this is done by creating a symbolic link to the 'sites-available' directory from the 'sites-enabled' directory.
sudo ln -s /etc/nginx/sites-available/nextcloud /etc/nginx/sites-enabled/nextcloud
Unlink the default file
We don't care for the default site anymore, so we remove it from the 'enabled' sites
sudo unlink /etc/nginx/sites-enabled/default
Install certbot
Certbot is a tool to get free HTTPS/TLS certificates for your domain from 'Let's Encrypt'.
sudo apt install certbot python3-certbot-nginx
Generating TLS certificates
We can now generate a TLS certificate. A TLS certificate is 'proof' that a website is safe, and provides information required for a browser to establish an encrypted connection with the website.
Replace <domain_name> with the domain you registered to the DNS
sudo certbot --nginx -d <domain_name>
# e.g. sudo certbot --nginx -d nextcloud.haggart.co.uk
This will return something like
...
Certificate is saved at: /etc/letsencrypt/live/nextcloud.haggart.co.uk/fullchain.pem
Key is saved at:         /etc/letsencrypt/live/nextcloud.haggart.co.uk/privkey.pem
Check that certbot modified the nextcloud config
The above step with certbot should automatically modify your 'sites-available/nextcloud' file to point to these new files.
You can check with cat, and the result should now include some lines that are # managed by Certbot, including a 'listen 443' section. 443 is the port used for HTTPS communication.
cat /etc/nginx/sites-available/nextcloud
// todo: what if not?
Tell Nextcloud about the subdomain
Now that we've set up the reverse proxy connection, we can return to setting up Nextcloud.
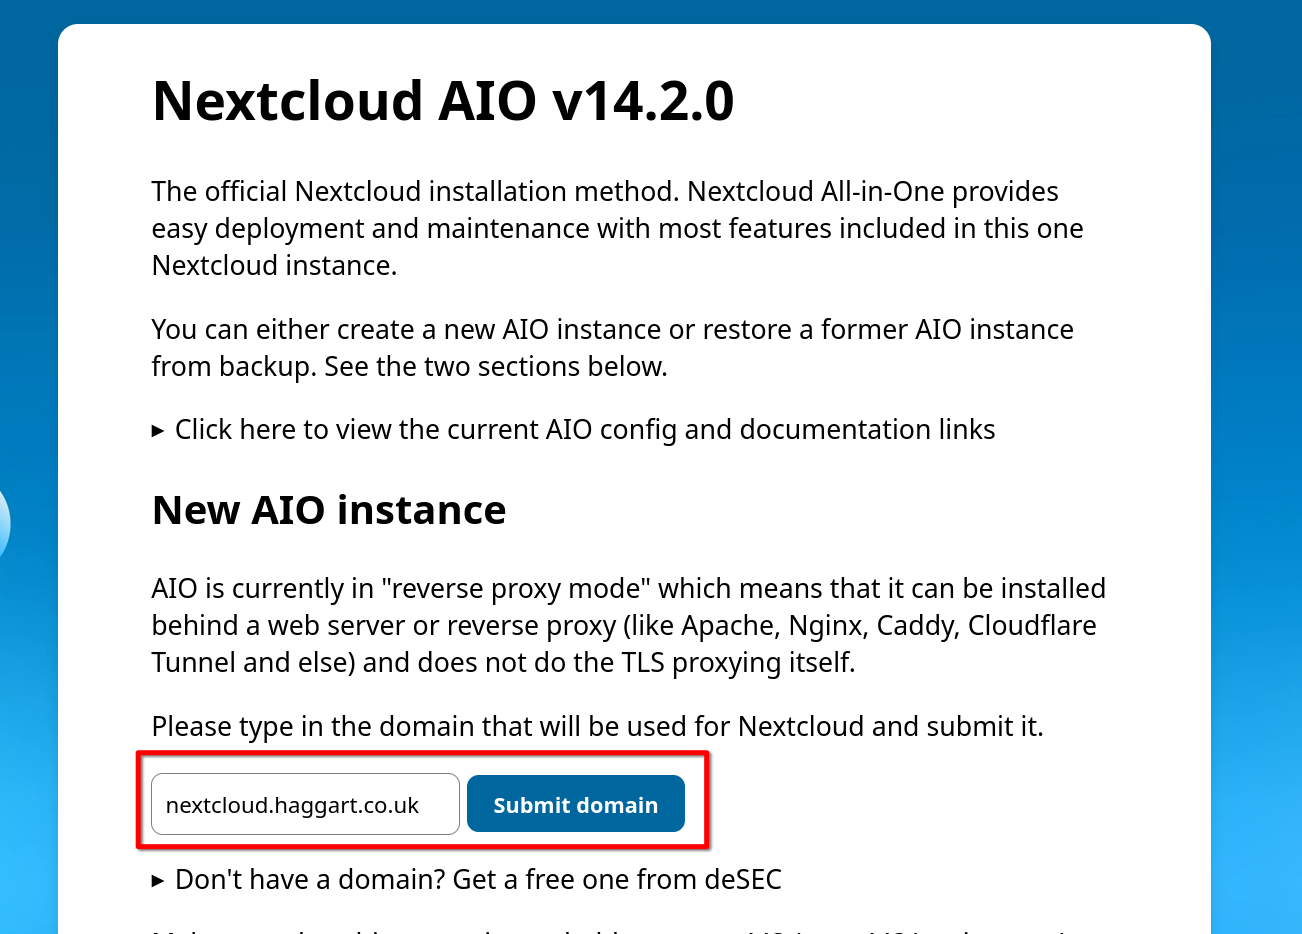
On the management interface (https://<pi_ip_address>:8080), you will be asked to enter the passphrase that we saved in the initial Nextcloud testing section.
Once you enter this, you will be prompted to enter the subdomain that we setup in the DNS section.
Configure the Nextcloud instance
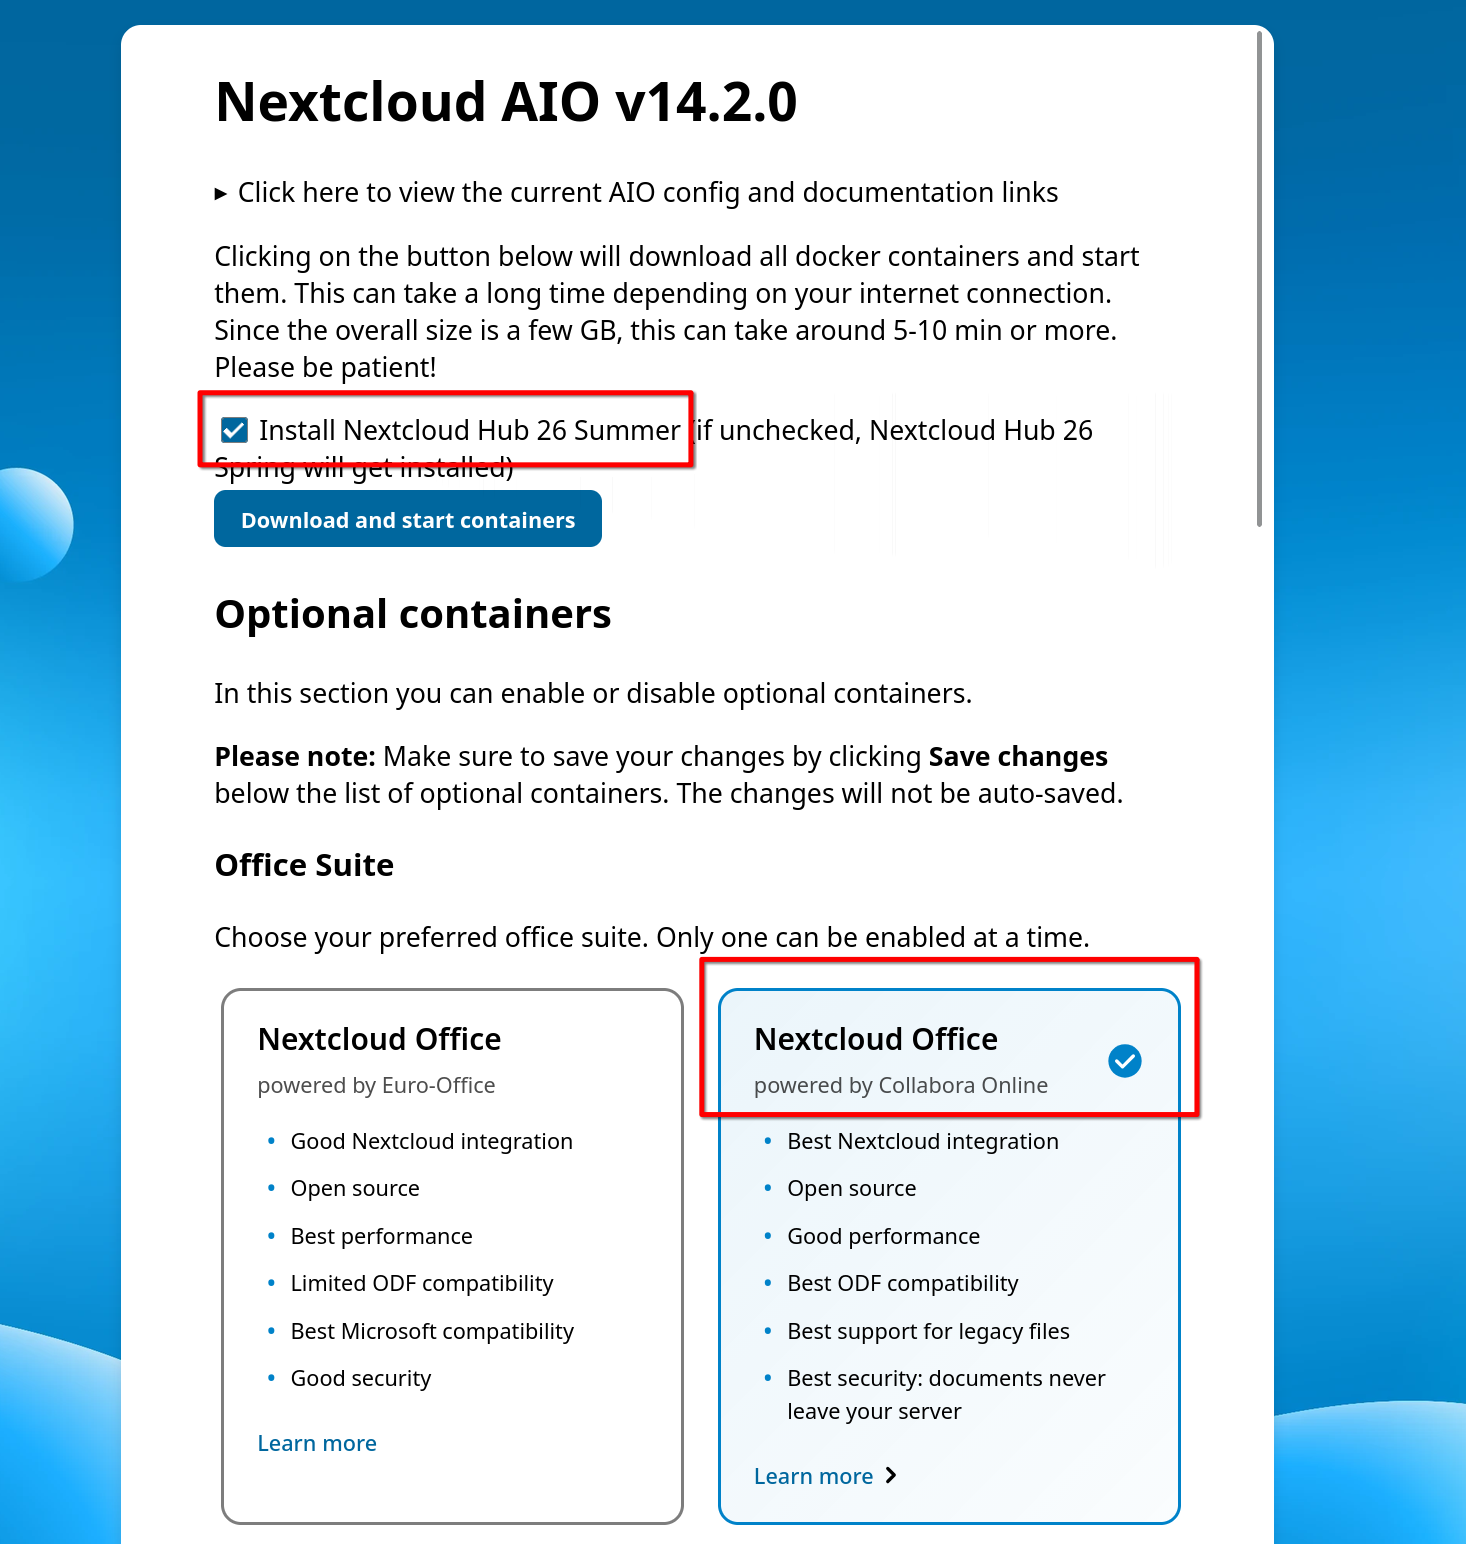
Here we get to choose how Nextcloud is configured. I chose to use Nextcloud Hub 26 Summer (just because it's newer), and the 'Collabora Online' version of Office, because it has 'best performance' and compatibility with ODF.
Below the scope of this screenshot are optional extras. I left these as default for this install.
Once you've made all your changes and saved them, click 'Download and start containers' to get it going.
Test it!
Okay, by now, everything should be set up. Go ahead and reboot the Pi (e.g. sudo reboot), then give it 5 minutes or so to set everything up (in particular Nextcloud can take some time to get up and running).
You can get your initial login details from the config portal (https://<pi_ip_address>:8080)
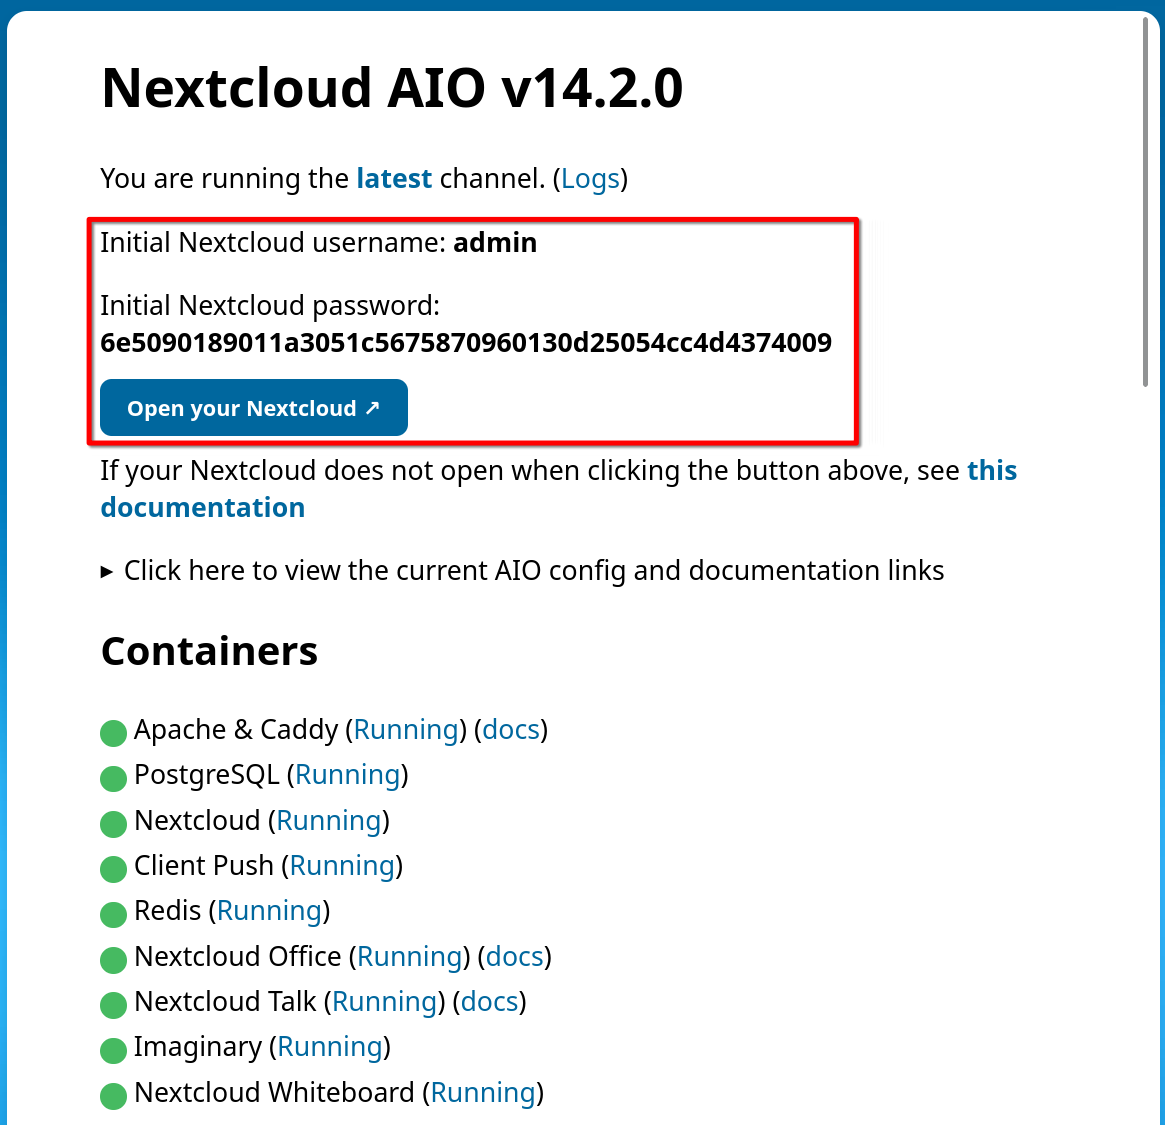
And now, on your PC, navigate to your Nextcloud subdomain (e.g. nextcloud.haggart.co.uk), and hopefully you should make it to the homepage where you can login!